The HTML class attribute is used to specify a single or multiple class names for an HTML element. Multiple HTML elements can share the same class.
The class name can be used by CSS and JavaScript to perform certain tasks for elements with the specified class name. The class attribute can be used on any HTML element.
A class attribute can be defined within <style> tag or in separate file using the (.) character. The class name is case sensitive.
Classes are used by CSS and JavaScript to select and access specific elements.
JavaScript can access elements with a specific class name with the getElementsByClassName() method.
The Syntax for Class in CSS
To create a class; write a period (.) character, followed by a class name. Then, define the CSS properties within curly braces {}:
Example – 1
<!DOCTYPE html>
<html>

<!-- In the following example we have three <div> elements with a class attribute with the value of "city". All of the three <div> elements will be styled equally according to the .city style definition in the head section: -->
<head>
    <style>
        .city {
            background-color: tomato;
            color: white;
            border: 2px solid black;
            margin: 20px;
            padding: 20px;
        }
    </style>
</head>

<body>

    <div class="city">
        <h2>London</h2>
        <p>London is the capital of England.</p>
    </div>

    <div class="city">
        <h2>Paris</h2>
        <p>Paris is the capital of France.</p>
    </div>

    <div class="city">
        <h2>Tokyo</h2>
        <p>Tokyo is the capital of Japan.</p>
    </div>

    <div class="city">
        <h2>Delhi</h2>
        <p>Delhi is the capital of India.</p>
    </div>

</body>

</html>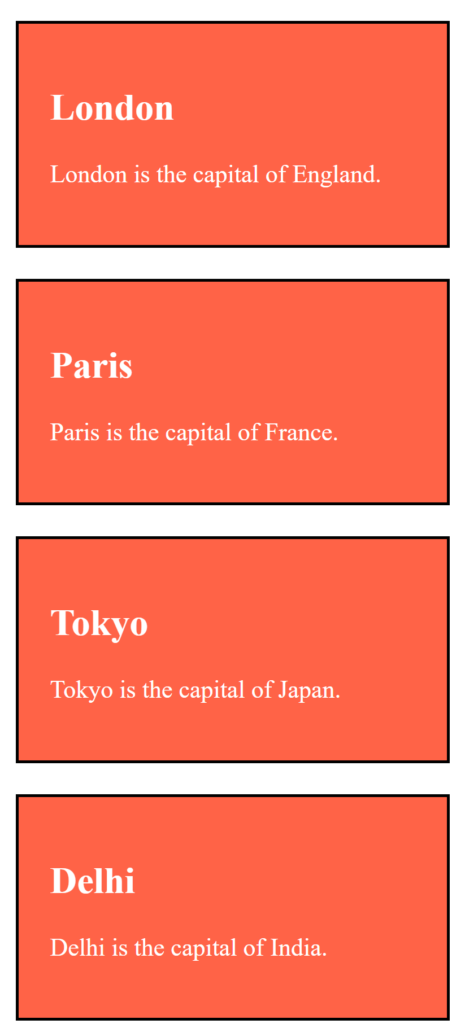
Example – 2
<!DOCTYPE html>
<html>

<head>
    <!-- In the following example we have two <span> elements with a class attribute with the value of "note". Both <span> elements will be styled equally according to the .note style definition in the head section: -->
    <style>
        .note {
            font-size: 120%;
            color: red;
        }
    </style>
</head>

<body>

    <h1>My <span class="note">Important</span> Heading</h1>
    <p>This is some <span class="note">important</span> text.</p>

</body>

</html>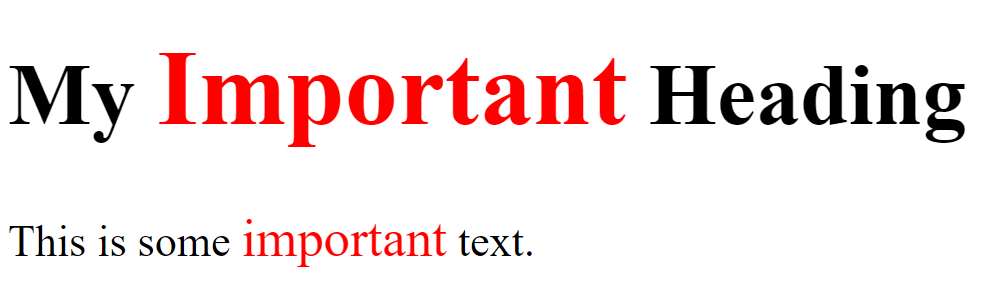
Example – 3 Multiple Classes
To define multiple classes, separate the class names with a space, e.g. <div class=”city main”>. The element will be styled according to all the classes specified.
<!DOCTYPE html>
<html>
<!-- In the following example, the first <h2> element belongs to both the city class and also to the main class, and will get the CSS styles from both of the classes: -->
<head>
    <style>
        .city {
            background-color: tomato;
            color: white;
            padding: 10px;
        }

        .main {
            text-align: center;
        }
    </style>
</head>

<body>

    <h2>Multiple Classes</h2>
    <p>Here, all three h2 elements belongs to the "city" class. In addition, London also belongs to the "main" class,
        which center-aligns the text.</p>

    <h2 class="city main">London</h2>
    <h2 class="city">Paris</h2>
    <h2 class="city">Tokyo</h2>

</body>

</html>
<!DOCTYPE html>
<html>
<!-- In the following example, both <h2> and <p> points to the "city" class and will share the same style: -->
<head>
    <style>
        .city {
            background-color: tomato;
            color: white;
            padding: 10px;
        }
    </style>
</head>

<body>

    <h2>Different Elements Can Share Same Class</h2>

    <p>Even if the two elements do not have the same tag name, they can both point to the same class, and get the same
        CSS styling:</p>

    <h2 class="city">Paris</h2>
    <p class="city">Paris is the capital of France.</p>

</body>

</html>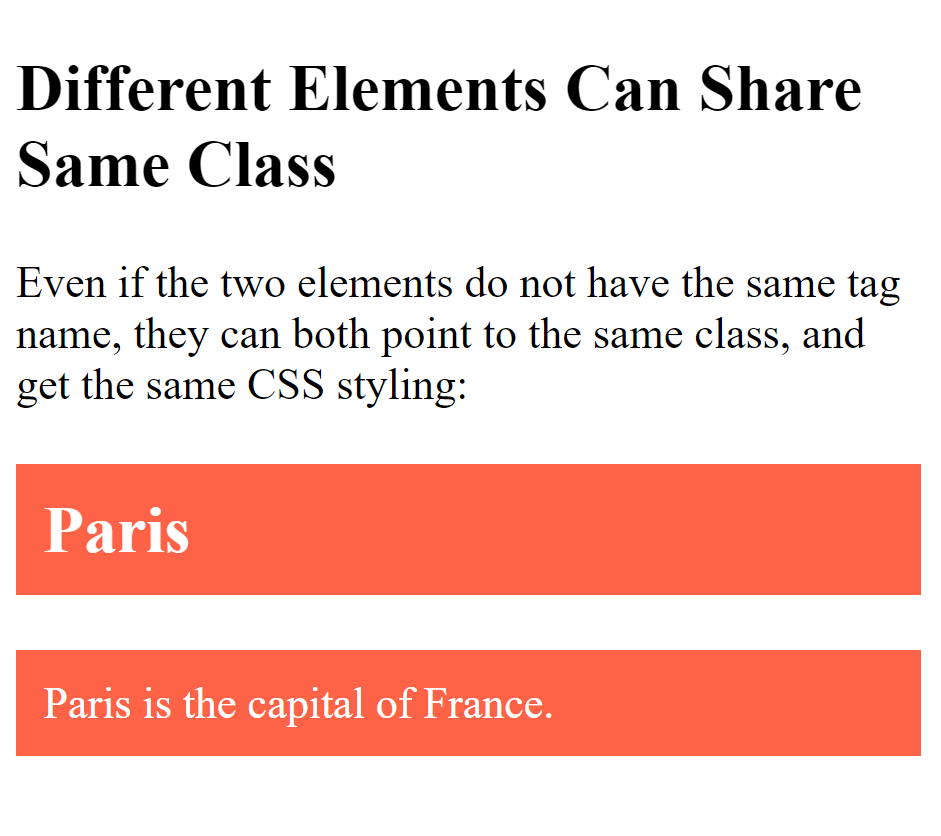
Use of The class Attribute in JavaScript
<!DOCTYPE html>
<html>

<body>

    <h2>Use of The class Attribute in JavaScript</h2>
    <p>Click the button to hide all elements with class name "city":</p>

    <button onclick="myFunction()">Hide elements</button>

    <h2 class="city">London</h2>
    <p>London is the capital of England.</p>

    <h2 class="city">Paris</h2>
    <p>Paris is the capital of France.</p>

    <h2 class="city">Tokyo</h2>
    <p>Tokyo is the capital of Japan.</p>
    <!-- JavaScript can access elements with a specific class name with the getElementsByClassName() method: -->
    <script>
        function myFunction() {
            var x = document.getElementsByClassName("city");
            for (var i = 0; i < x.length; i++) {
                x[i].style.display = "none";
            }
        }
    </script>

</body>

</html>
You can learn much more about CSS and JavaScript in our CSS and JavaScript tutorial .